Welcome to my BC4WP tutorial! This article documents my experience setting up a Wordpress instance on a Raspberry Pi and connecting it to a BigCommerce store through the BC4WP plugin, from start to finish. Overall, the process should take a couple of hours or less, depending on DNS propagation and familiarity with Linux commands. Don't worry.. even if you have limited experience with Raspberry Pi, Linux, DNS or SSL certificates, you should be able to follow along and create your own Wordpress store.
This particular process involves a Raspberry Pi, however you should be able to apply the same principles to any other Wordpress setup on a Linux based server, such as a Google VM or other cloud based web hosting service.
Please note: this article links to several other tutorial articles, links of which are subject to change. Several articles will inevitably be outdated at some point.
Pre-requisites:
- A BC store that allows a custom domain (i.e. a sandbox or store on a paid plan)
- A Raspberry Pi and SD card (at least 8 GB)
Step 1: Set up the DNS
I chose to do this step first so DNS had time to propagate while I went through the rest of the steps.
A. Acquire a free domain.
Freenom is a good choice for a free domain. I already had an account, but it's quick and easy to sign up if you don't already have an account. I registered bc4wp.ga, and chose the 12 months free plan. The DNS will eventually need to point to my home IP address, which I can then direct to the internal LAN IP address of the raspberry pi. I use Spectrum for my home internet service, and they don't offer static IP addresses for home internet plans. That presents a challenge if I want to have a reliably available home web server. For that reason, I need to make use of a dynamic DNS (DDNS) service that can update DNS records any time my home IP address changes. Namecheap offers this service for free.
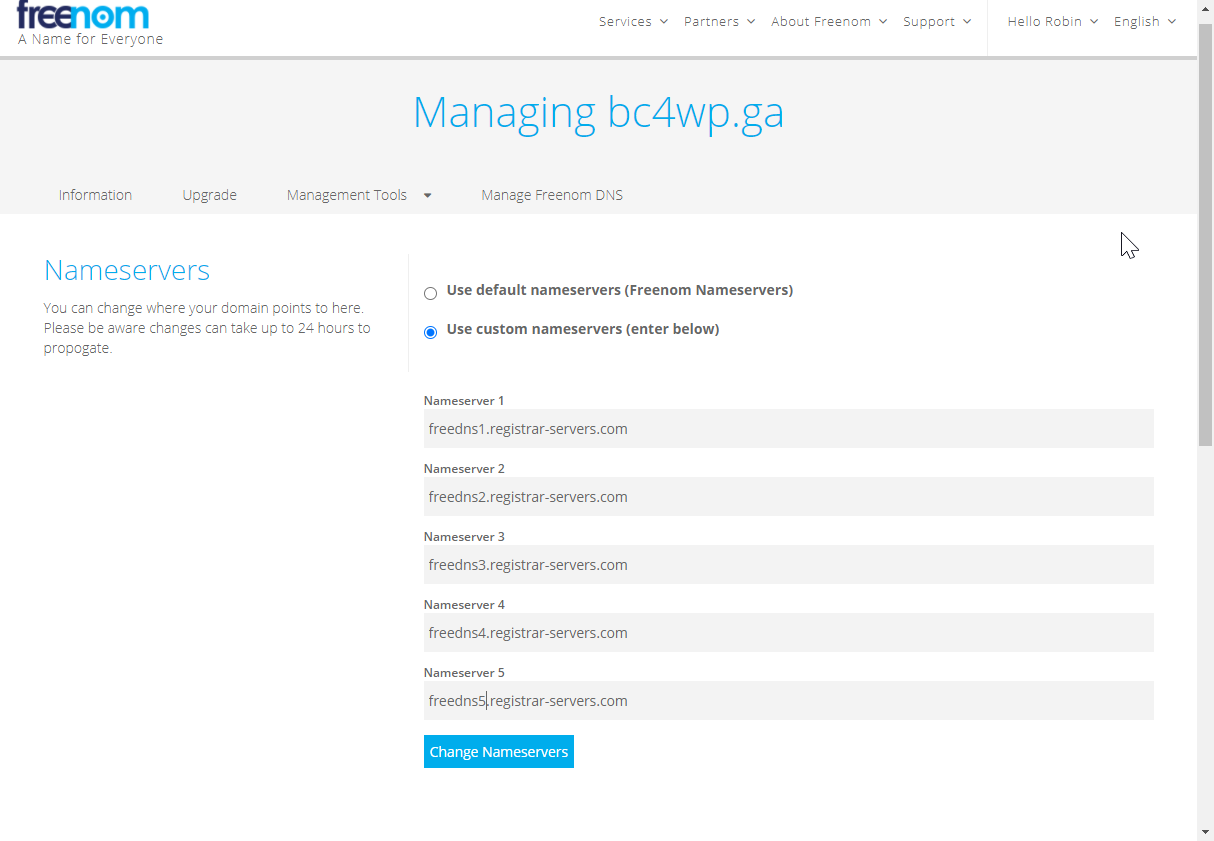
Since I plan to use Namecheap's free DDNS, I went ahead and set the name servers to Namecheap's servers during the initial setup:
B. Set up DDNS
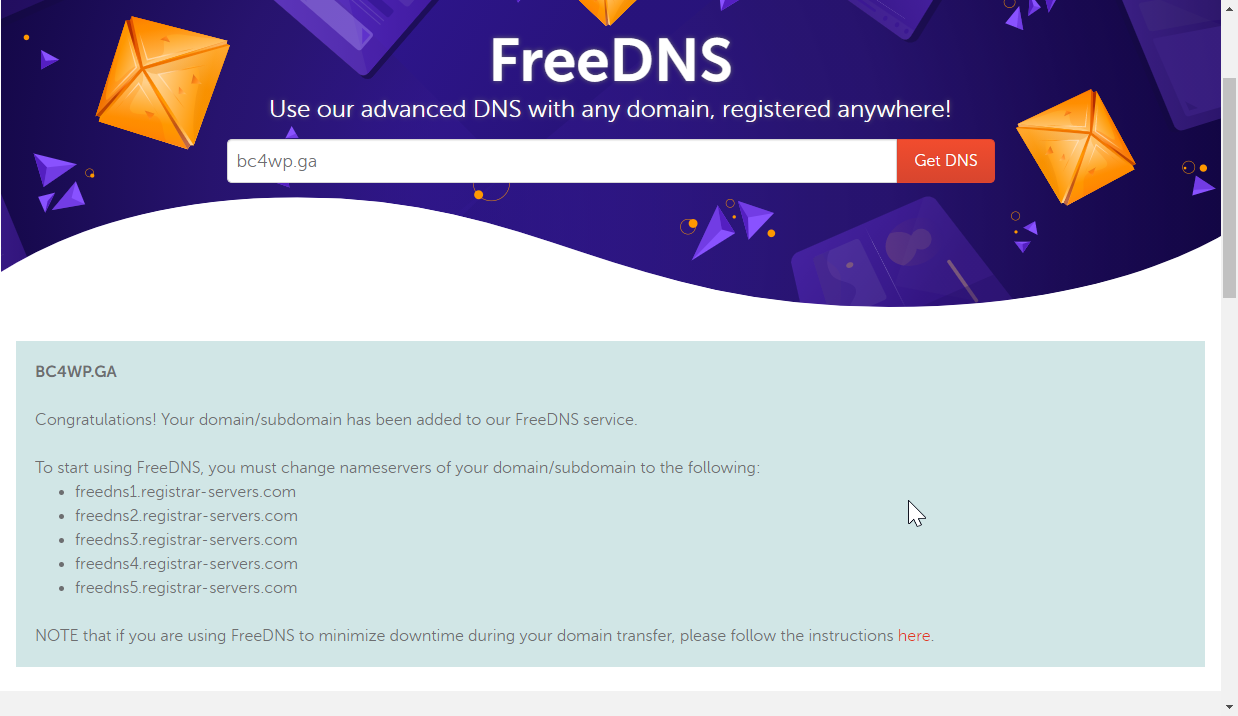
Those nameservers set up in the last step won't do anything if the DNS is not set up at the Namecheap servers, so I then set up the Namecheap account. After signing up for the free account, I navigated to Domains > FreeDNS and searched for my newly acquired domain. It showed the option to get DNS for that domain for free. After registering the domain in Namecheap, this confirmation screen lists the domain name servers I already took care of in the previous step:
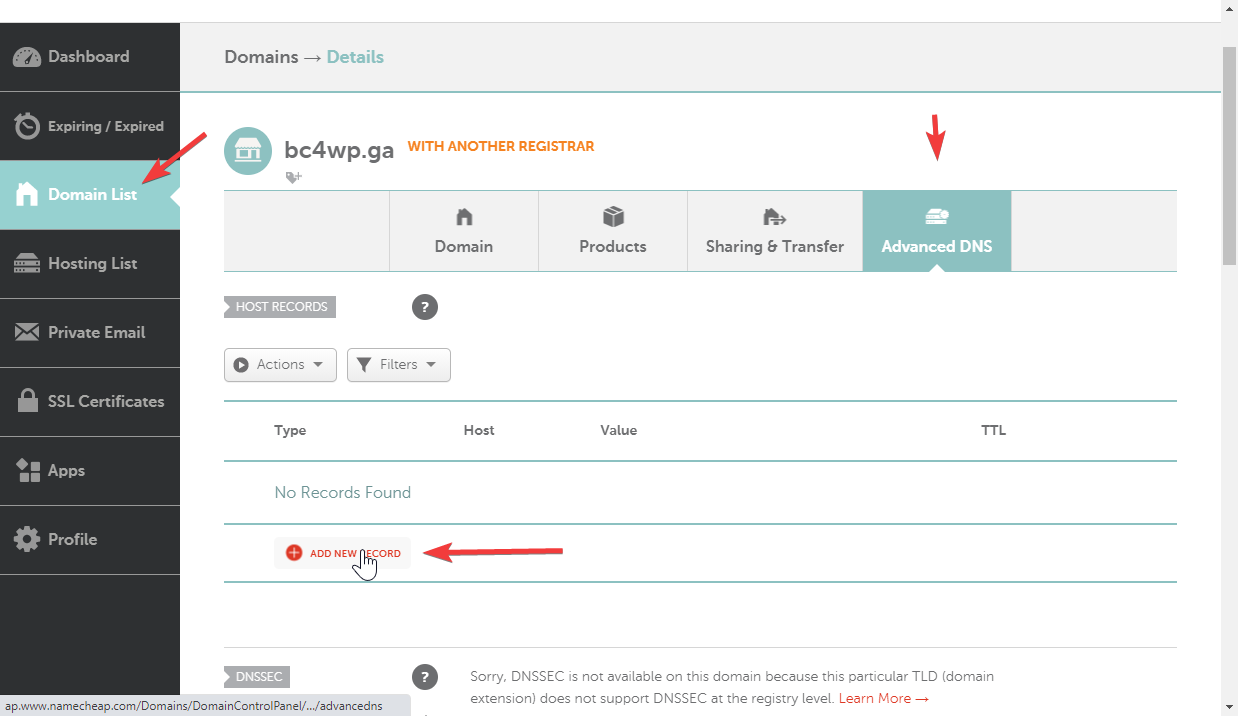
 I then navigated to my Namecheap dashboard, clicked "Manage" by the domain I just added, and went to the Advanced DNS section, where I added my DNS records:
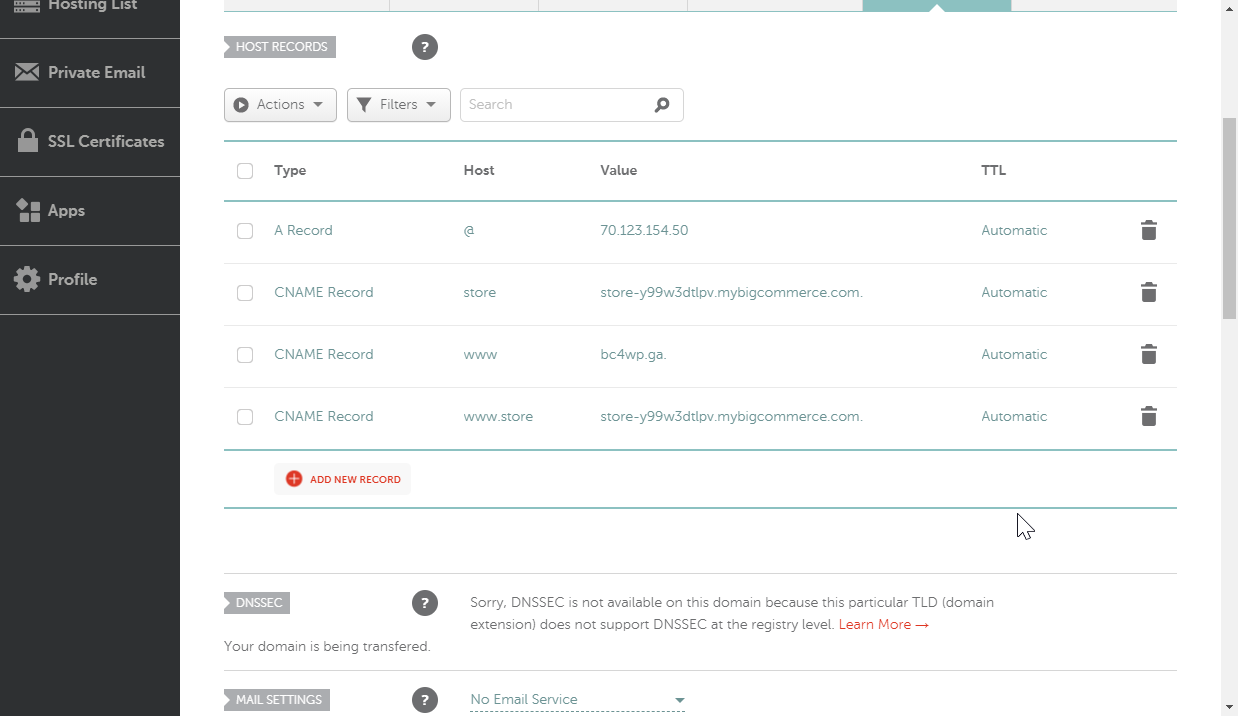
 I checked to see what my public IP is (Googled "what is my IP") and added that as an A record.
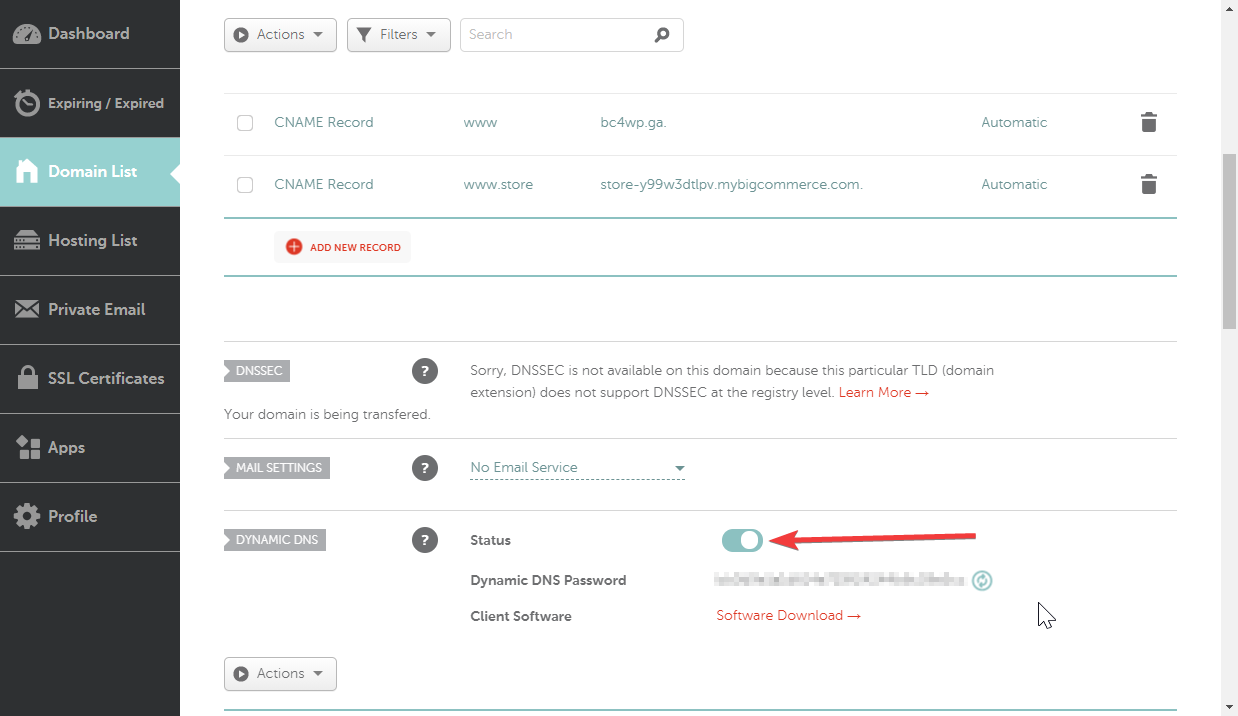
Since I intended to use BC4WP's embedded checkout feature, I also added a CNAME record that points a subdomain to my BC store. Having the BC store at [subdomain].bc4wp.ga will allow the embedded checkout to receive requests without triggering any cross domain errors that some browsers have issues with. Namecheap doesn't require the full domain/subdomain for the host field, so I just entered "store" for the host and my BC canonical URL for the value. I also added www CNAME records to both root domain and the BC subdomain. I ended up with 4 DNS records:
I checked to see what my public IP is (Googled "what is my IP") and added that as an A record.
Since I intended to use BC4WP's embedded checkout feature, I also added a CNAME record that points a subdomain to my BC store. Having the BC store at [subdomain].bc4wp.ga will allow the embedded checkout to receive requests without triggering any cross domain errors that some browsers have issues with. Namecheap doesn't require the full domain/subdomain for the host field, so I just entered "store" for the host and my BC canonical URL for the value. I also added www CNAME records to both root domain and the BC subdomain. I ended up with 4 DNS records:
 Finally, since I plan on using the Dynamic DNS feature, I enabled that and made note of the password.
 Now I let that propagate, and moved on to the next step, setting up the Pi.
Step 2: Set up the Raspberry Pi
For a very small Wordpress site like this one, an 8gb SD card should be enough, especially if you use Raspberry Pi OS lite, which doesn't come with a built in GUI. The different variants of the official Raspberry Pi OS (formerly known as Raspbian) are available here. There are several tutorials available on how to install the OS using an imager program to write the image to an SD card, however using the Raspberry Pi Imager is so self explanatory that no tutorial is needed.
Since I intended to control the Raspberry Pi without a separate keyboard/mouse/monitor, I needed to enable SSH, which is disabled by default. This is possible to achieve without ever connecting directly to the Pi, by placing an empty file named "ssh" in the boot directory.
After installing the OS and enabling SSH, I booted the Pi and set a secure password and set other basic settings such as locale, timezone, etc. This setup is covered in many tutorials you can find online such as this one.
In previous steps, I set the DNS of my custom domain to point to my public IP, but I need web requests to my public IP to be directed specifically to the internal LAN IP of the Raspberry Pi. For this to happen, I needed to set my router to forward external ports 80 (http) and 443 (https) to the internal IP of the Raspberry Pi. The process for port forwarding is different for different routers, but most have easily accessible instructions available online.
In order for that port forwarding to work, I needed to set my Raspberry Pi to have a static IP address on my local network. I was able to do that by editing the dhcpcd.conf file, as described here.
Now that the initial Rpi setup was done, I could move on to setting up Wordpress.
Step 3: Install Wordpress
It's best to follow the steps in this article, but I've included a quick summary of the commands here. Basically, I just ran the following commands in my SSH terminal connected to the Raspberry Pi.
A. Install Apache
sudo apt-get install apache2 -y
B. Install php
sudo apt-get install php -y
C. Install mysql
sudo apt-get install mariadb-server php-mysql -y and restart apache sudo service apache2 restart
D. Install WP
Remove existing website files cd /var/www/html/ sudo rm *
E. Download and extract WP
sudo wget http://wordpress.org/latest.tar.gz sudo tar xzf latest.tar.gz sudo mv wordpress/* . sudo rm -rf wordpress latest.tar.gz sudo chown -R www-data: .
F. Set up the WP database
Run the secure installation sudo mysql_secure_installation Follow the instructions on screen, note the password set. At this point, it's definitely best to check the detailed instructions in the walkthrough linked above.
G. create the WP database
sudo mysql -uroot -p create database wordpress; Note: I changed the following line to use my own password instead of 'YOURPASSWORD' GRANT ALL PRIVILEGES ON wordpress.* TO 'root'@'localhost' IDENTIFIED BY 'YOURPASSWORD'; FLUSH PRIVILEGES; Press ctrl+D to quit, reboot the pi
H. Configure Wordpress
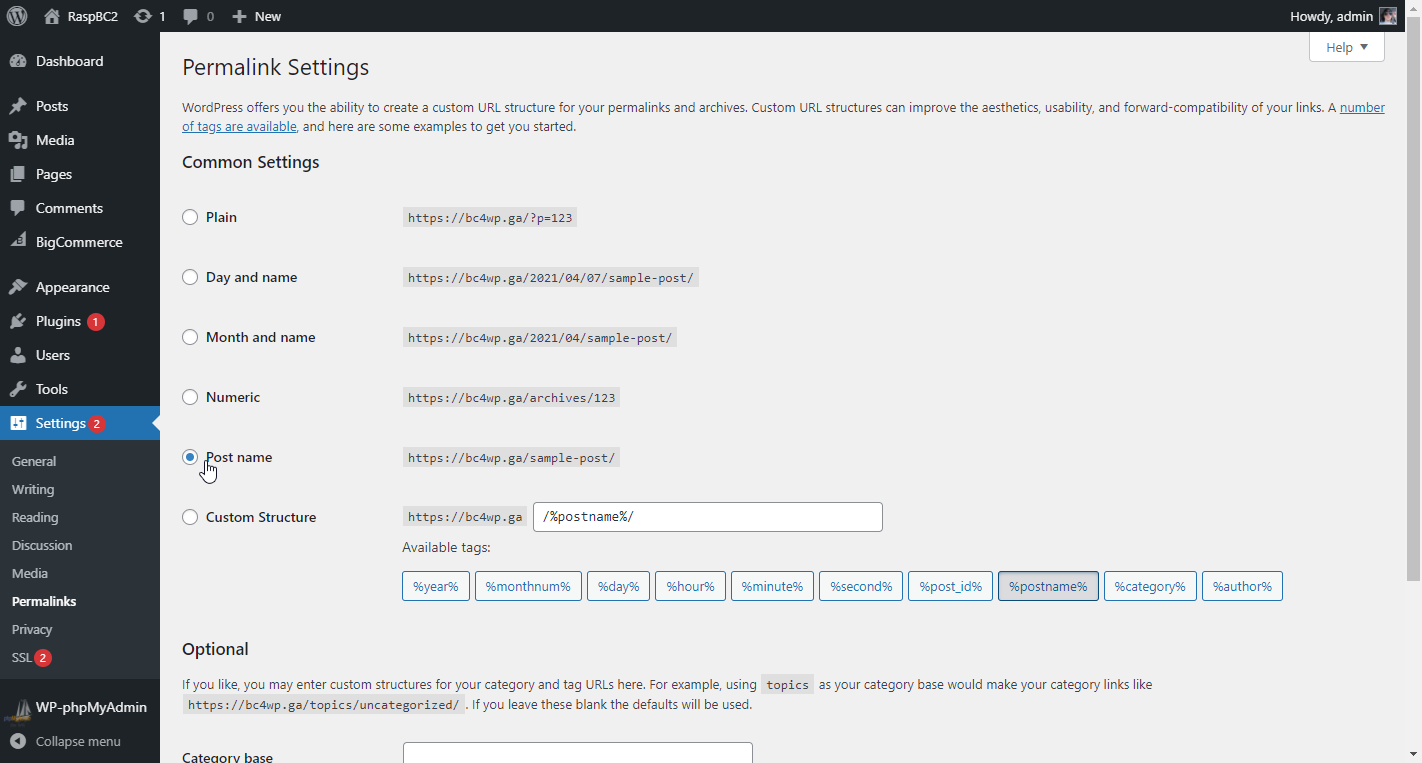
I navigated to my local IP address and followed the on-screen instructions. Again, refer to the linked walkthrough if necessary. Per the walkthrough, I set the permalink settings to "Post Name" at Settings > Permalinks.
I. Enable Apache rewrite mod
Back in the SSH terminal, I ran the following sudo a2enmod rewrite
J. Tell the virtual host serving the site to allow requests to be overwritten.
sudo nano /etc/apache2/sites-available/000-default.conf Add the following after the first line, save the file:
AllowOverride All
==== IMPORTANT NOTE! ====
The walkthrough in the article linked above does not mention installing php-curl. This is necessary for everything to run smoothly, but isn't pre-installed on Raspberry Pi OS lite. I forgot to install this the first time, and ran into problems later. I've included my troubleshooting steps further down in the article, if you want to follow exactly what I did. However, if you just want to do things properly to begin with, run the following commands after installing Apache:
sudo apt-get install php-curl
K. Restart apache
sudo service apache2 restart Wordpress is now installed and functional! At this point, I was able to access the site publicly at my home IP address, but it wasn't secure, so I moved on to the SSL.
Step 4: Install the SSL
NOTE: This step requires the DNS propagation from step 1 to be finished. I had to wait just a bit for this to complete, but overall it was pretty quick, since all of the DNS records were new.
A. Create a free SSL certificate
Certbot is a free option to install an SSL certificate. I found instructions for the setup process here. As with the WP setup, it's probably best to follow the steps in that linked guide, but here is a quick summary. SSH into the Pi and type the following commands:
sudo apt update sudo apt install snapd sudo snap install core; sudo snap refresh core sudo snap install --classic certbot sudo ln -s /snap/bin/certbot /usr/bin/certbot sudo certbot --apache
This last command prompts for site owner info. Enter the following:
- email address
- Y to agree to TOS
- N (or y if you want) to share email with EFF
- domain (bc4wp.ga)
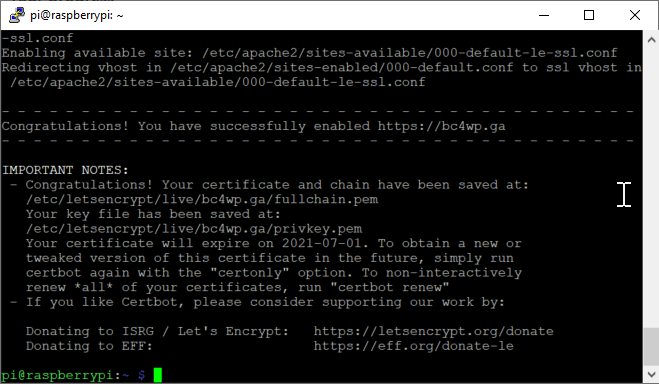
This was the success message I got when done:
B. Configure WP to use the SSL
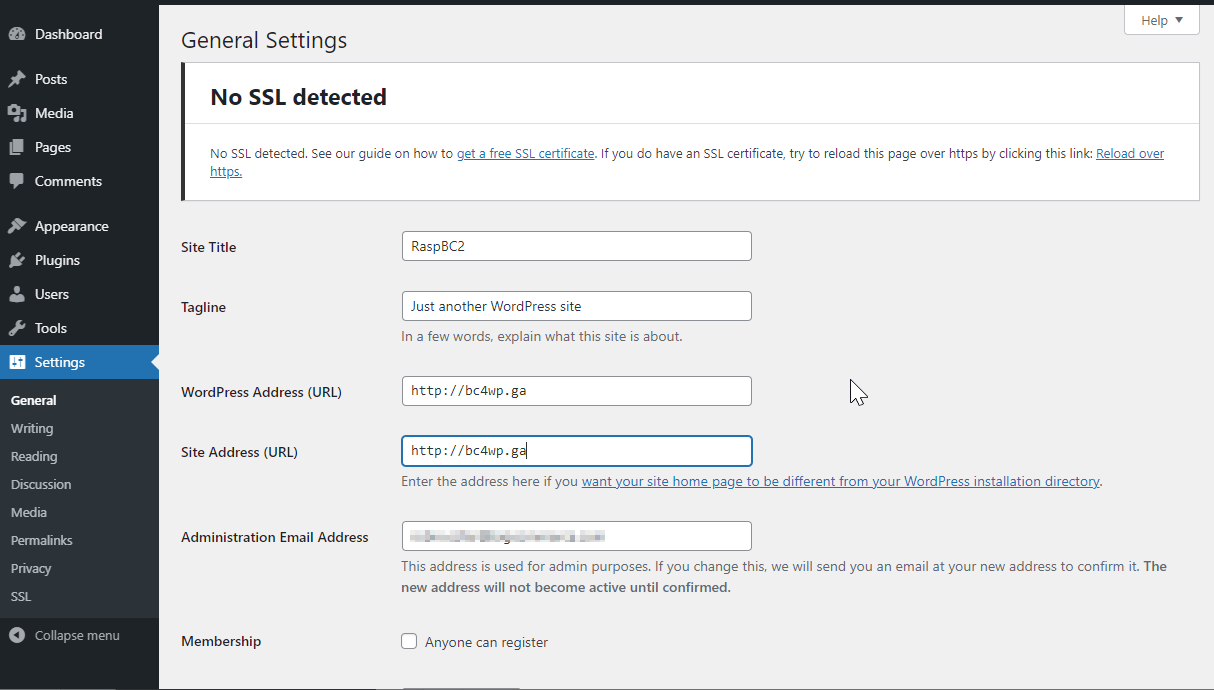
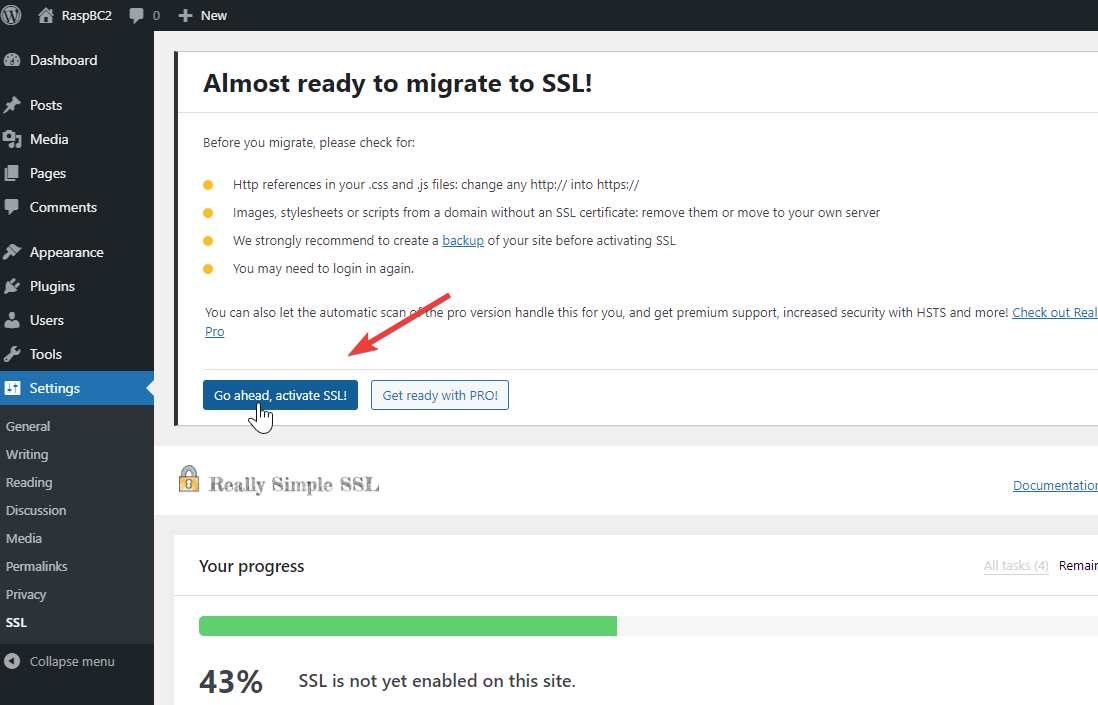
Now that the SSL was ready, I logged in to WP dashboard and navigated to Settings > General, and made sure the URLs were set properly. I set them to the http version first, since it's not yet configured to use SSL. If you set these URLs to use https before it's set up, it may cause access problems since it will try to serve the control panel and storefront over https but won't be able to. The plugin in the next couple of steps will take care of that though.
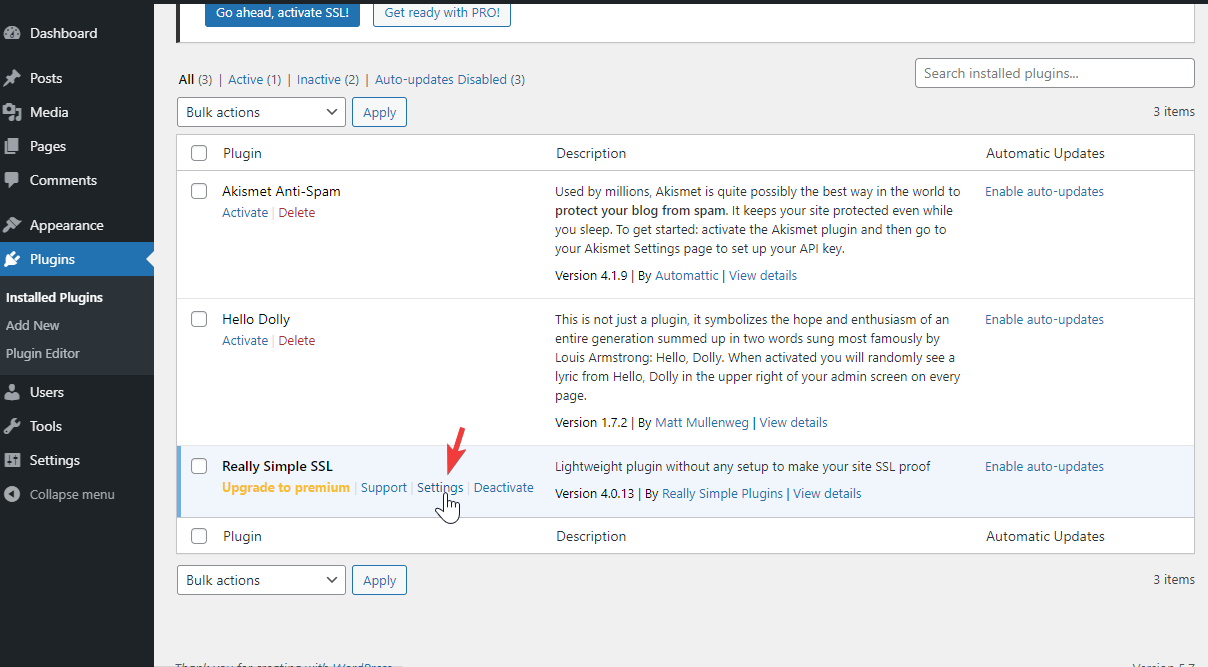
After verifying those URLs, I installed the Really Simple SSL plugin. The installation and setup is.. really simple.
- Navigate to Plugins > Add New
- Search for "really simple ssl"
- Install and activate the plugin, then go to settings and activate SSL:
Step 5: Set up the DDNS client
This is the final (optional) step before installing the BC4WP plugin. Everything was working correctly at this point, but what if Spectrum decides to change my public IP address? I wanted to have a "set it and forget it" setup.. this extra step ensures I don't have to think about this stuff later.
** EDIT: Since I first set this up, I moved and switched to AT&T internet. Because I had already set up DDNS, there was NO extra adjustments or setup necessary. I just moved the raspberry pi to my new place, plugged it in, and voila! The custom domain I assigned to the Wordpress instance magically just works at the new IP address. I highly recommend this step for a set it and forget it setup.
There's a good guide here. I skipped to the "Installing DDclient" section, since all the rest has already been taken care of. Once again, SSH into the Pi and do the following:
A. Install DDclient
sudo apt-get install ddclient -y
It doesn't matter what I put for the DNS service provider or other answers when prompted, since I overwrote all the settings in the next step. I just entered through all of the questions.
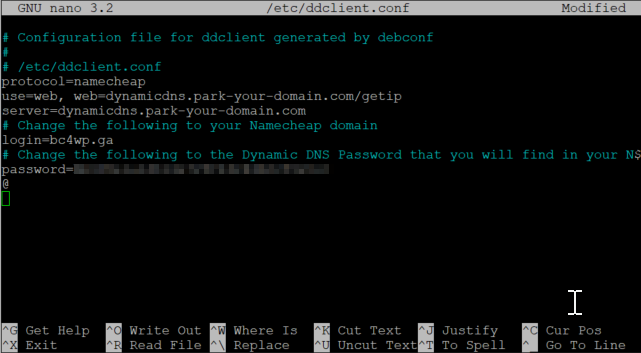
B. Edit the DDclient config file
sudo nano /etc/ddclient.conf
I replaced everything there with the following:
| # Configuration file for ddclient generated by debconf # # /etc/ddclient.conf protocol=namecheap use=web, web=dynamicdns.park-your-domain.com/getip server=dynamicdns.park-your-domain.com # Change the following to your Namecheap domain login=yourdomain.com # Change the following to the Dynamic DNS Password that you will find in your Namecheap dashboard password=a3f5f501589245dAacaf4d20d37Ed7f1 @ |
Of course, I replaced "yourdomain.com" with my domain bc4wp.ga, and set password to the actual password I got from Step 1 (B) above:
Restart the service:
sudo systemctl restart ddclient.service
Done!
Step 6: Add the subdomain to BC
This step is pretty straightforward. Apply domain to BC store. If DNS was done properly and it's fully propagated, the SSL should auto install.
Step 7: Install and configure the BC4WP plugin
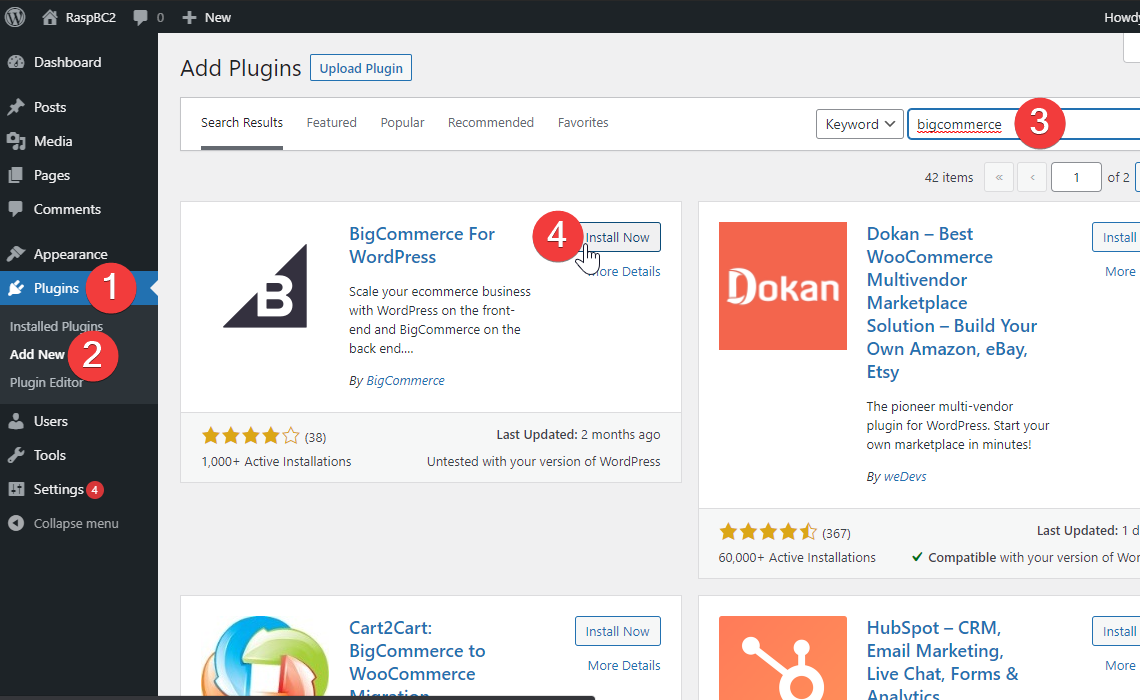
At this point, the hard stuff was out of the way (so I thought) and I could let the plugin's easy automatic setup handle the heavy lifting from here. I navigated to Plugins > Add New, and searched for "bigcommerce". I clicked to install the plugin.
==== NOTE ====
At this point, I ran into the error I mentioned above at the end of step 3. If you installed php-curl as suggested there, you can skip this section. I included my troubleshooting steps here, just in case it helps to troubleshoot other similar errors.
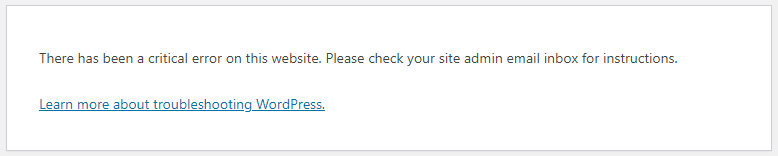
After installing, I clicked the activate button, which should allow me to get right into the configuration. I ran into this error
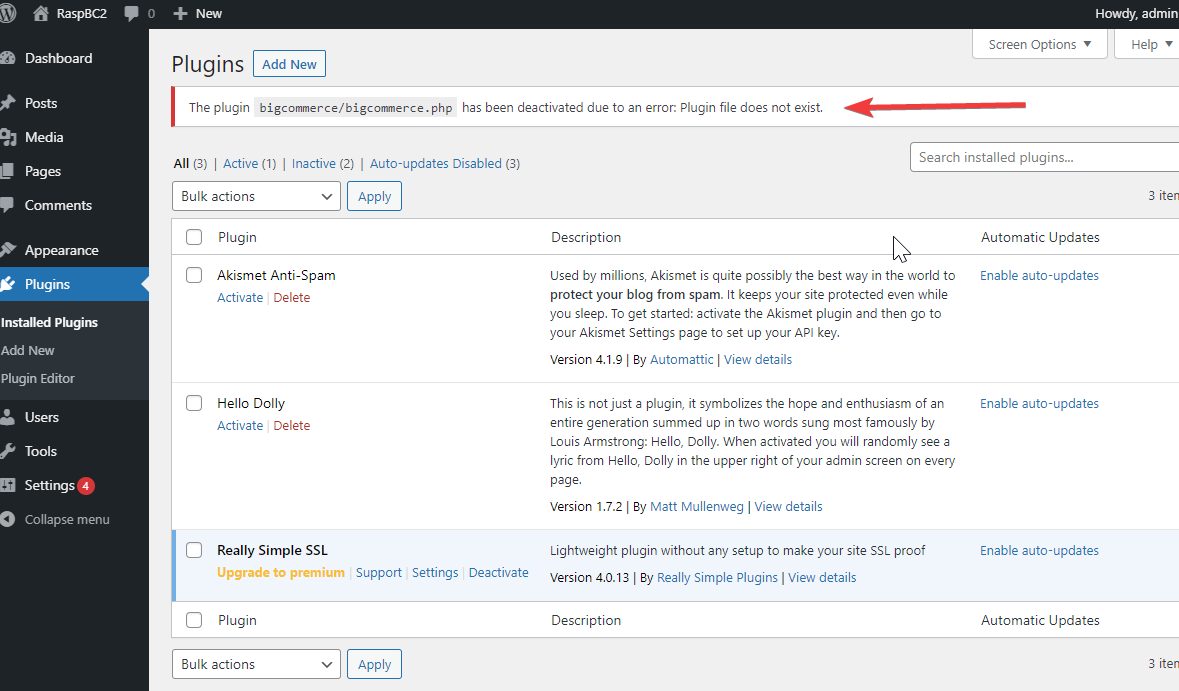
I tried to navigate back to the plugins page, but I got the same error. I then tried to get back to the login page, same error. Oh no! The site was completely broken! Not a big deal though. I used SSH to get back into the Pi, and navigated to the plugins folder:
cd /var/www/html/wp-content/plugins
This folder is where all of the plugins are contained within their own folders. If there's any problem plugin that can't be uninstalled in the dashboard, it can be manually uninstalled here by simply removing the folder. The Bigcommerce plugin is one that broke the site, so I only removed that folder.
sudo rm -r bigcommerce
This allowed me to log back in, where I saw the following notice:
To get a better idea of what was going on, I enabled the debug mode in Wordpress. This is done by manually editing the config file:
cd /var/www/html sudo nano wp-config.php
The following line just needs to be changed from false to true:
define( 'WP_DEBUG', false );
I made the change, saved the file, and tried to install and activate plugin again. I got following errors:
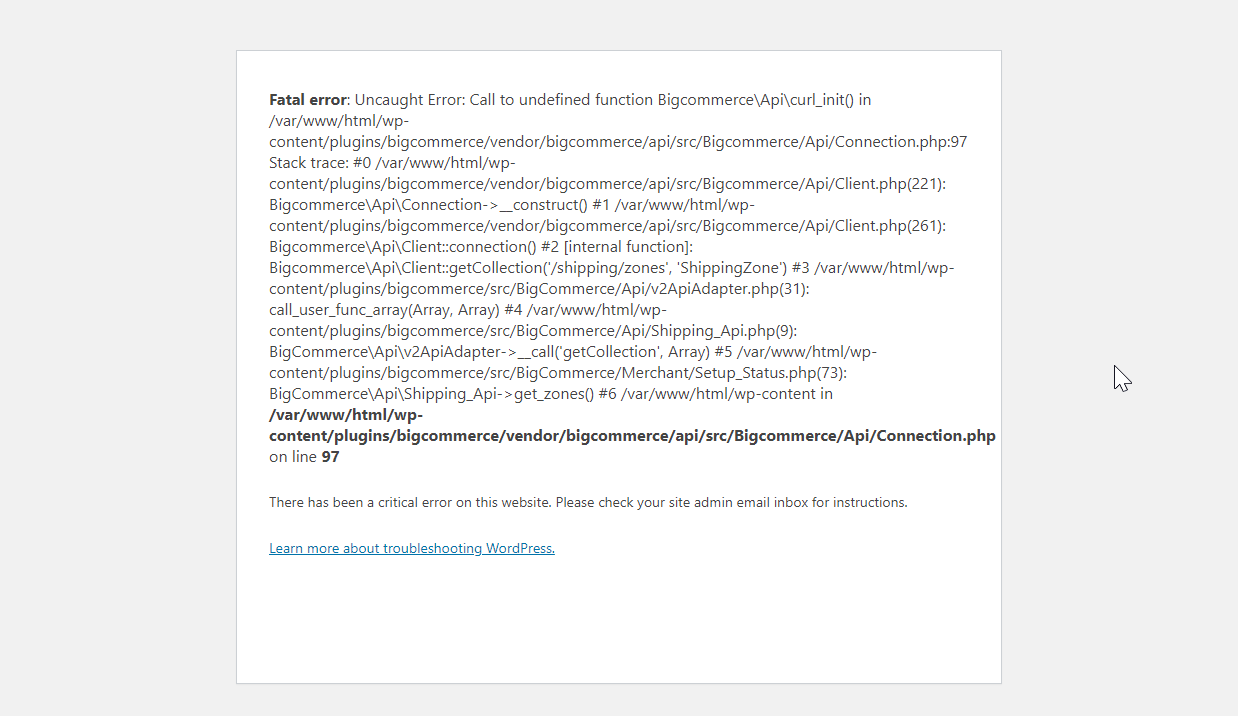
I recognized that the following bit is likely related to php-curl:
undefined function curl_init()
A quick Google search confirmed my suspicion that this indicates php-curl is not installed. I was able to install with the following commands:
sudo apt-get install php-curl
sudo /etc/init.d/apache2 restart
Since the activation process did not finish earlier, I manually removed the BigCommerce plugin folder again, then went through the normal installation/activation process. This time it worked!
=============
At this point, I was back on track, and ready to configure the plugin.
**Note: If you're logged in as an employee, it's best to do the next step in an incognito window or a different browser so you're not logged in as staff.
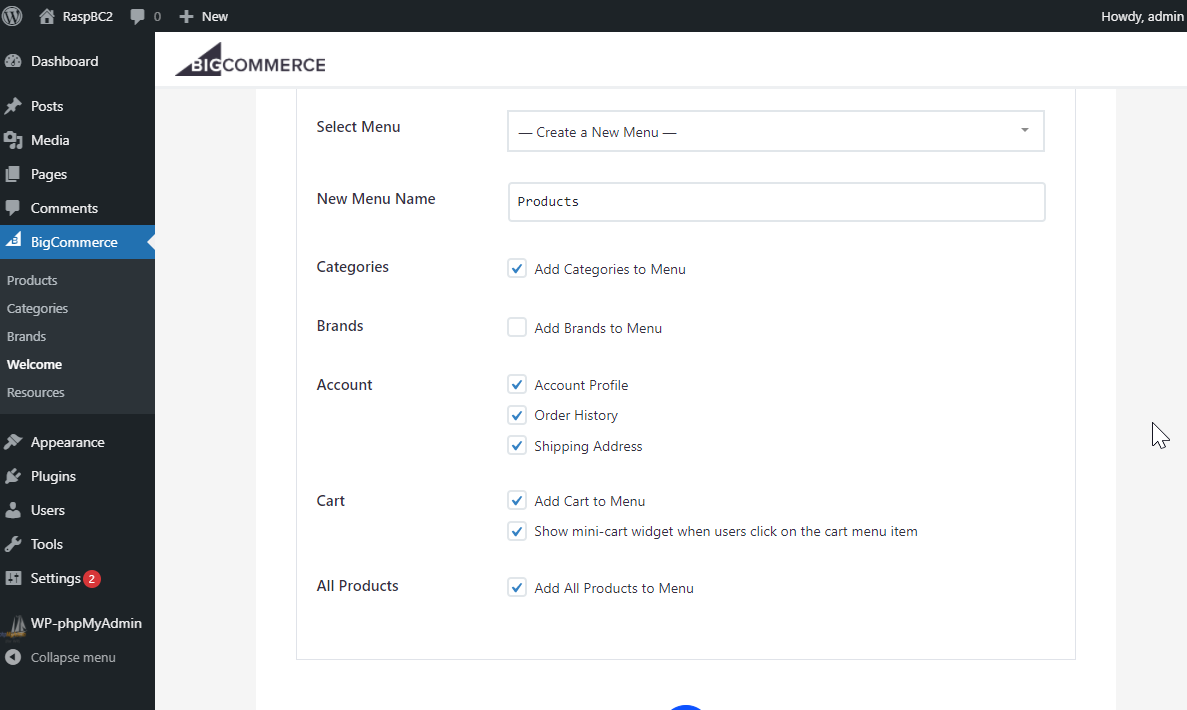
At this point the plugin was activated. I clicked "get started" in plugin main screen. I walked through steps, logging in to my store as the owner account. When asked how I wanted to use BC4WP, I selected "full featured store" I set up menus to include everything except Brands. No particular reason, I just often don't assign brands to my test products.
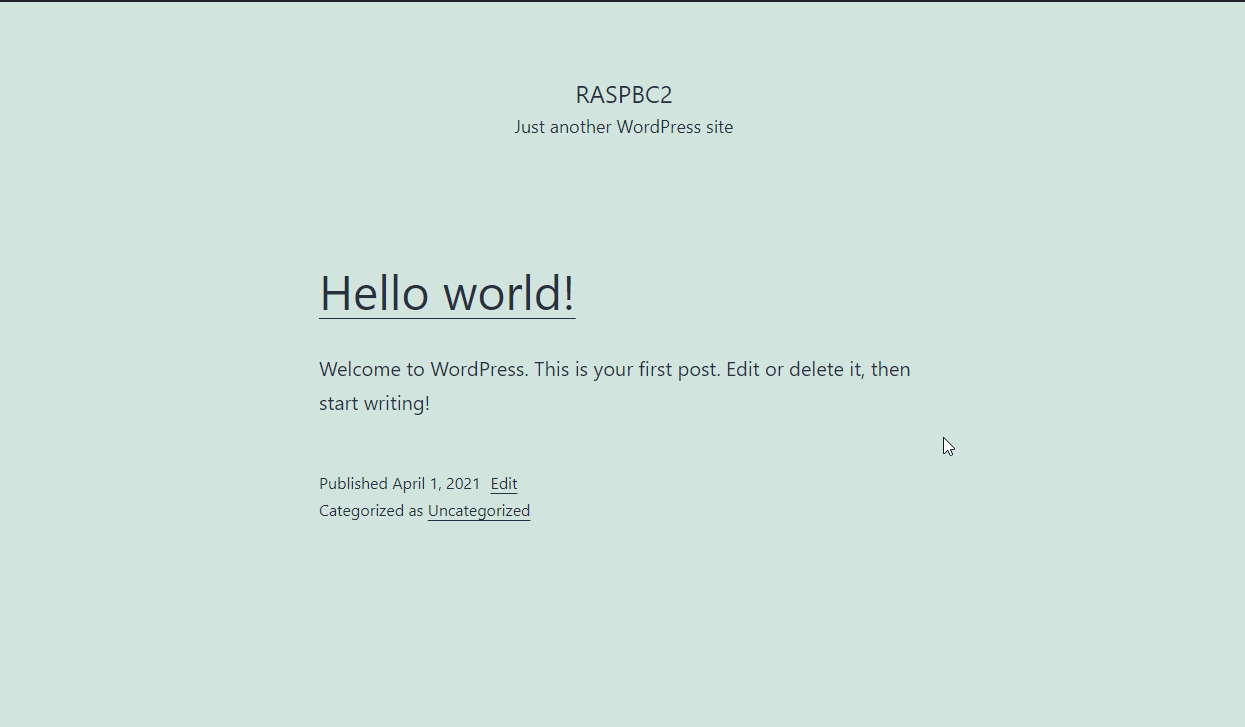
I finished the setup and watched the sync do its thing. This was now syncing products, but they didn't show on the WP site until I made a few changes. The home page looked like this:
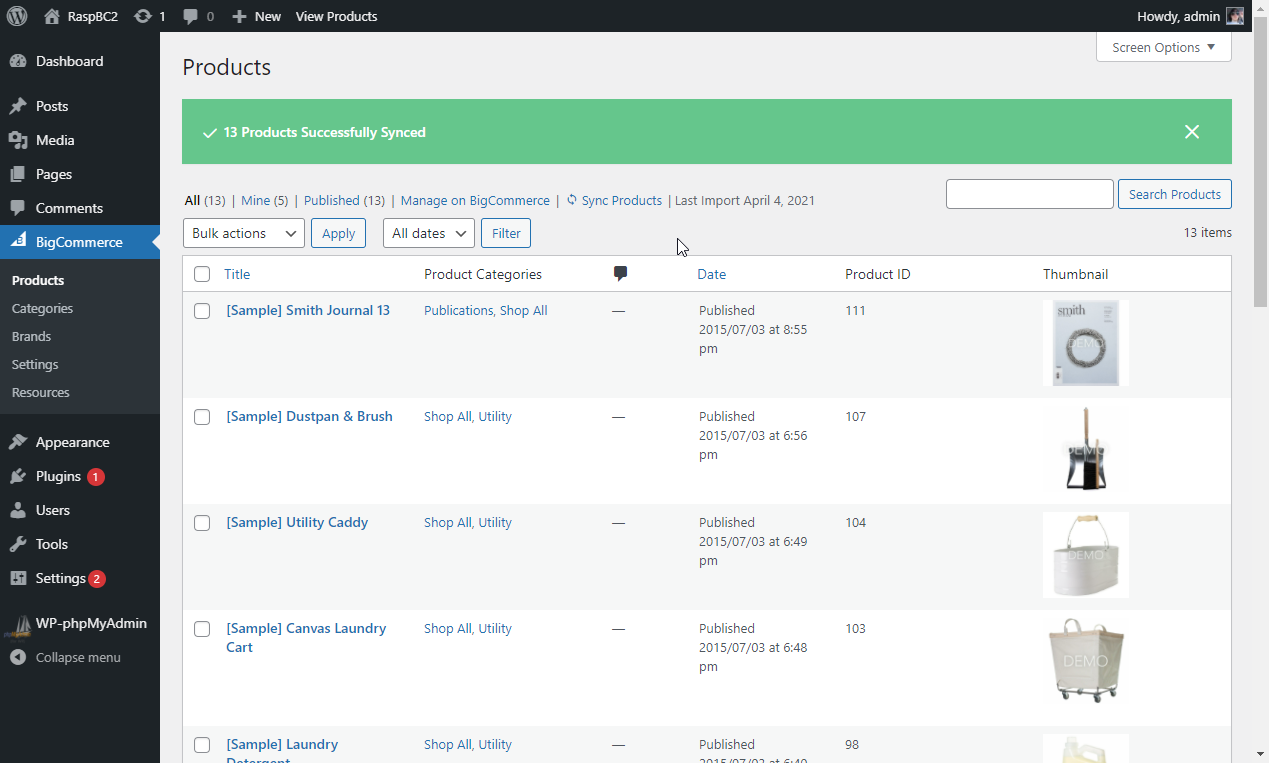
I knew the sync worked, since I could see products in the BC4WP plugin:
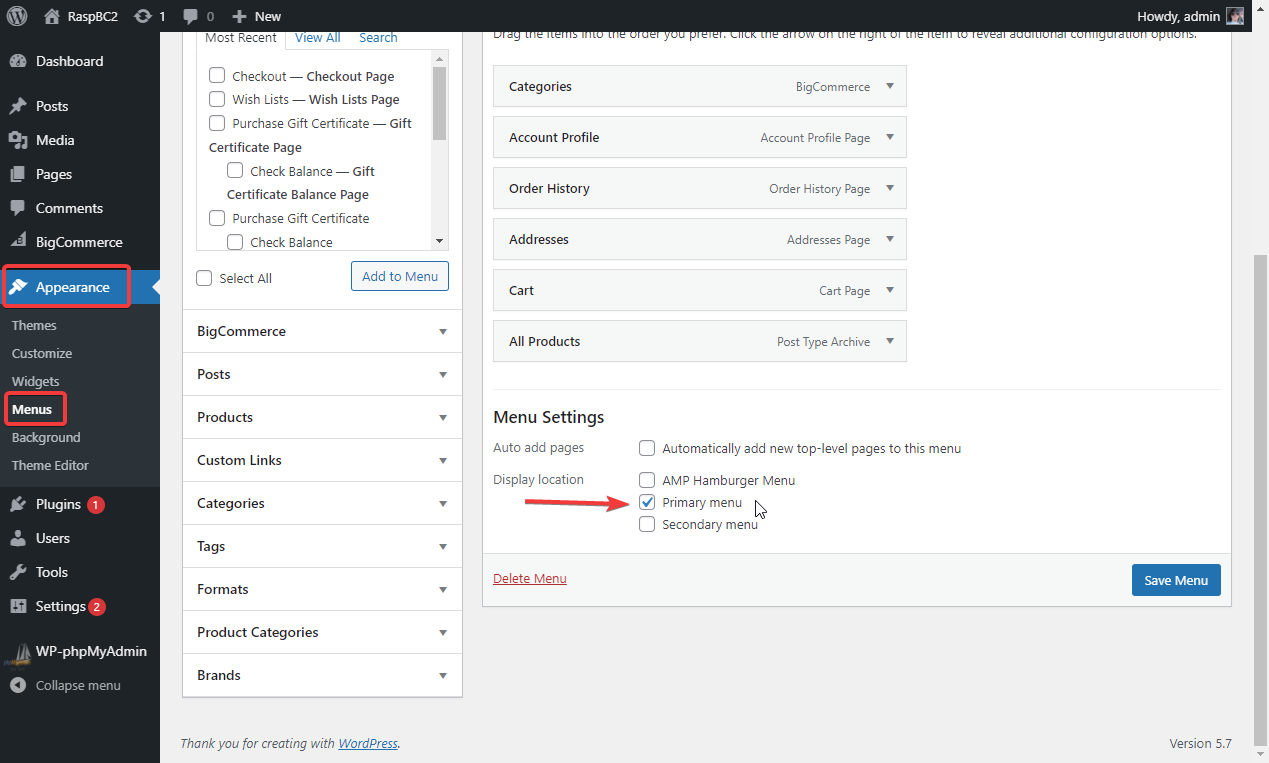
To make the menus show on the home page, I had to set the menu display location:
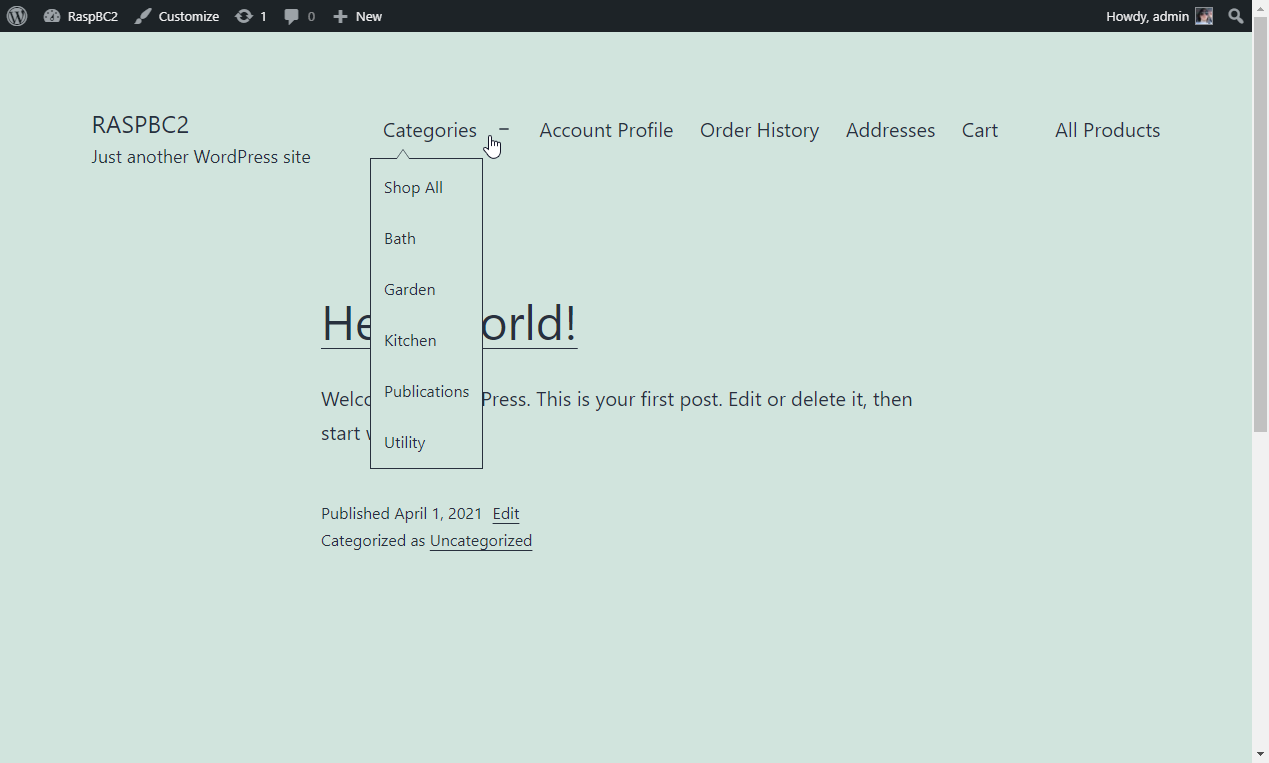
After saving those changes, the menus were added to the top of the home page:
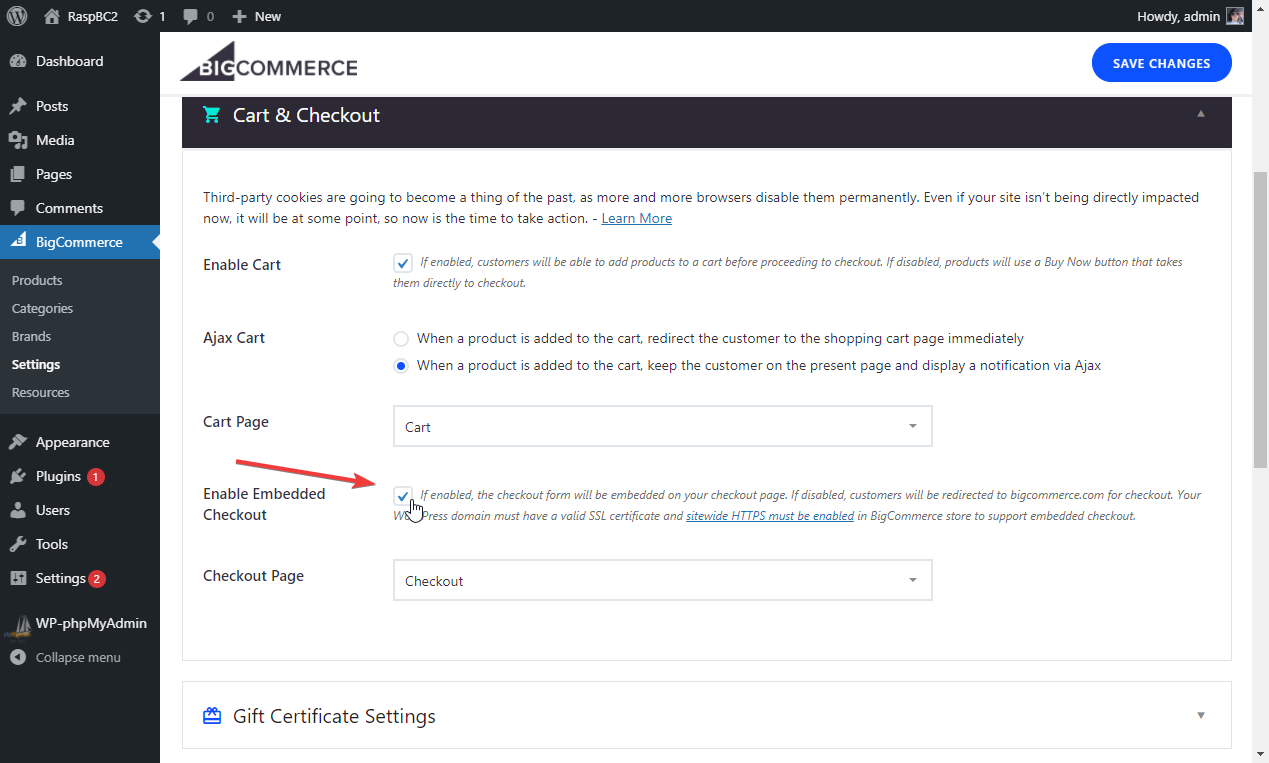
The final step was to enable embedded checkout. Since I'd set the main domain to WP and the subdomain to BC correctly, I could go ahead and safely enable embedded checkout here:
I launched my BC store (otherwise I wouldn't be able to access the embedded checkout page) and checked everything out. Since I had set up all the shipping methods and payment methods, everything worked as intended. To finish up, I placed a test order:
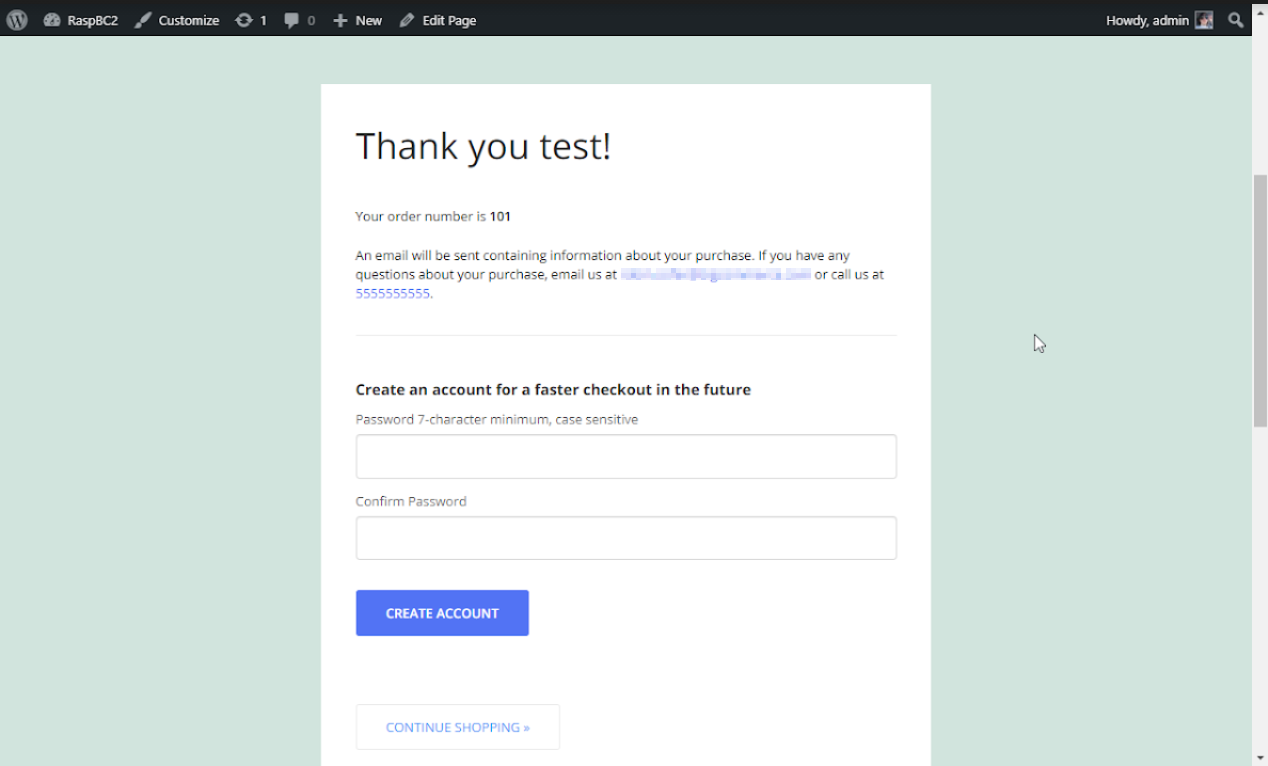
And done!